Understanding WIP Limits
Originally published November 2024
In the Importance of Visualizing Work in Kanban article, we dove into the Kanban practice of visualizing your work and why effective visualization is crucial for understanding the flow of work, identifying bottlenecks, and enabling teams to make informed decisions to improve service delivery. This month, we’ll explore another Kanban practice: Limiting Work in Progress (WIP).
In any service delivery, managing workload effectively can be tricky. One tool to help in this workload management is Work in Progress (WIP) limits. WIP limits introduce signals (known as kanbans) that indicate whether capacity for starting work is available. WIP limits are a powerful mechanism that can help teams improve their workflow and, ultimately, delivery time. Let's explore this concept and its various applications.
What Are WIP Limits?
WIP limits are constraints that restrict the amount of work allowed in progress at any given time. They serve a critical purpose: balancing demand with capability.
Demand: What a team is asked to do.
Capability: What a team is able to do.
It’s so important it’s worth repeating: WIP limits play a vital role in balancing demand with a team's capability to deliver. Limiting work in progress is a deliberate decision, helping teams align what they are asked to do with what they can realistically accomplish. By setting these limits, a team makes its capacity constraints visible and ensures they are not overloaded with too much work. This practice not only prevents overcommitment but also helps regulate the flow of work, promoting a smoother, more consistent workflow.
The Pull Mechanism
With WIP limits in place, they create a "pull" mechanism within your process flow. This means new work is no longer added, or pushed, onto a team; instead, the team pulls in new work when there is capacity for it. Implementing a pull-based system allows work to flow smoothly through the system, with new work entering only when there's room.
WIP Limit Approaches
In last month’s issue, we discussed visualizing a workflow (our kanban system). With that workflow now identified, identifying a WIP limit approach is the next step. There are several ways to limit work in a kanban system. I’ve included below a few approaches in order of team maturity, as outlined in The Kanban Maturity Model by David Anderson and Teodora Bozhevo.
Per Person WIP Limits:
What it is: This approach sets a limit on how many tasks each team member can work on simultaneously. E.g. Joe works on no more than two items at a time, Hunter three items, Latoya two items, etc.
When to use: Implement this when you notice team members struggling with multiple tasks or when context-switching is causing productivity issues. It may also be used when each team member performs work truly independent of any other team member (note: teams should consider carefully if individual work is truly independent from each member. Sometimes, it appears to be, but oftentimes it is not).
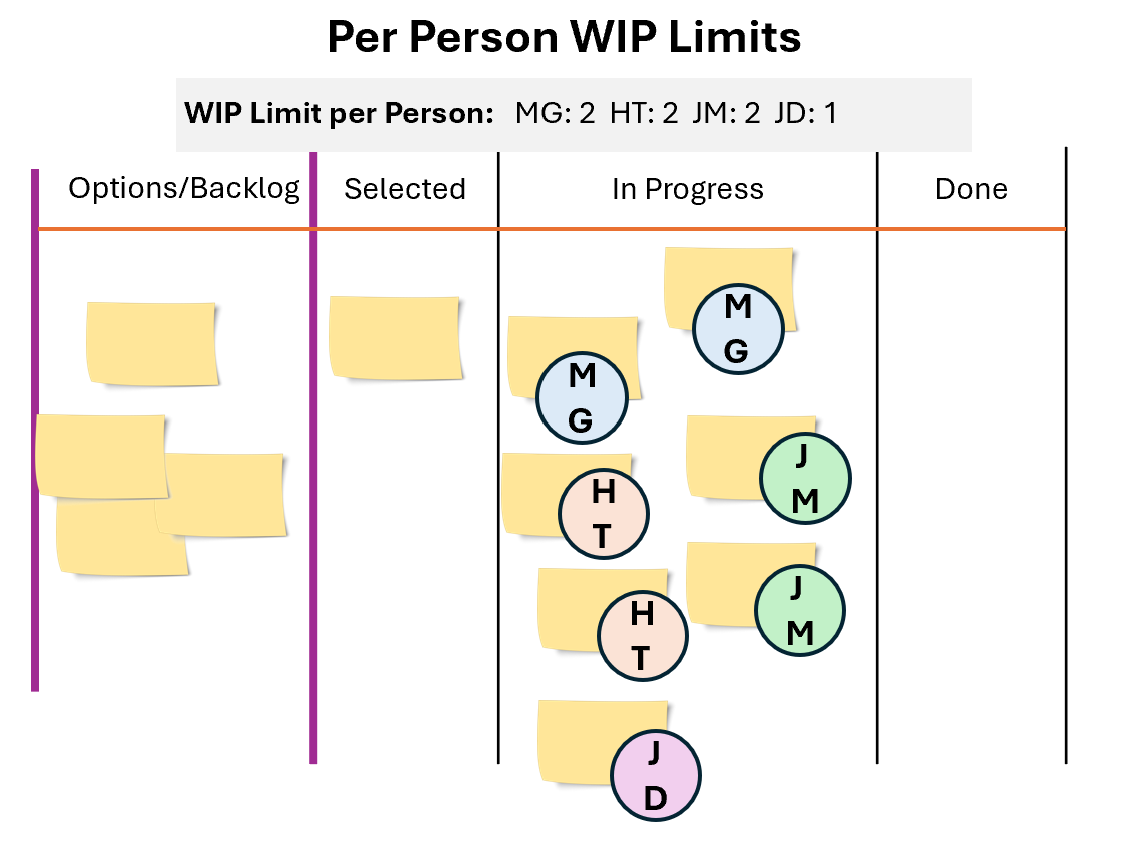
Per Person WIP limits can be visualized by placing a name or avatar on the work item itself. Having a key designating the WIP limit for each individual is also necessary.
Team WIP Limits:
What it is: This approach sets WIP limits on the team as a whole. E.g. the entire team cannot work on more than four items at a time (whether it be within the entire workflow, or particular stage of the workflow, etc.).
When to use: To ensure the team focuses on finishing existing work before taking on new work. Also helps establish team collaboration, knowledge sharing, and a culture of “delivering customer value together.”
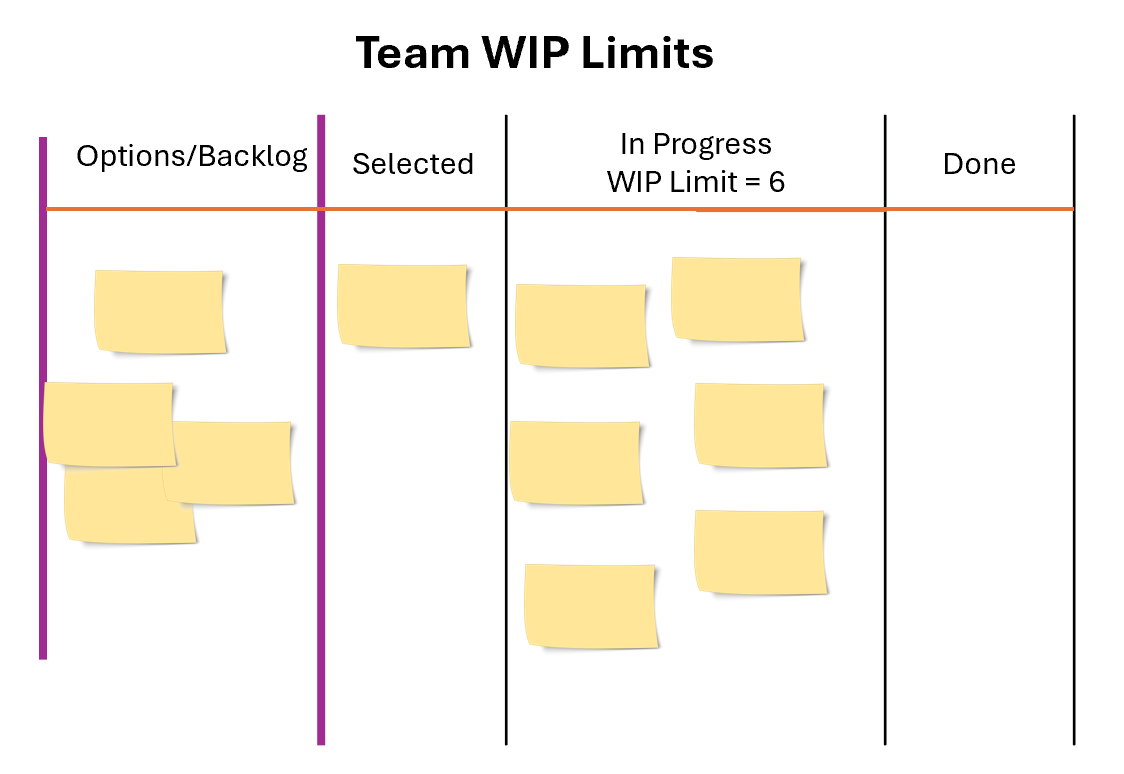
Team WIP Limits can be visualized by designating the total number of work items above a “Doing” or “In Progress” column.
CONWIP (Constant Work in Progress):
What it is: This approach involves setting a fixed limit on the total amount of work allowed in the "In Progress" or "Doing" stage of the workflow, regardless of the number of sub-columns within this stage (see last month’s “Visualization” article for more on expanding a "Doing" stage). For example, if the CONWIP limit is set to six for the three sub-columns in your "Doing" stage—such as Analysis, In Dev, and Testing—the limit applies to the total number of work items across all three sub-columns combined.
When to use: CONWIP is particularly useful for managing end-to-end flow in simpler processes or when you want to focus on overall system throughput rather than individual stage efficiency. Can also be good for teams transitioning from a push-based system to a pull-based approach, helping establish a rhythm where work is only started when capacity allows.
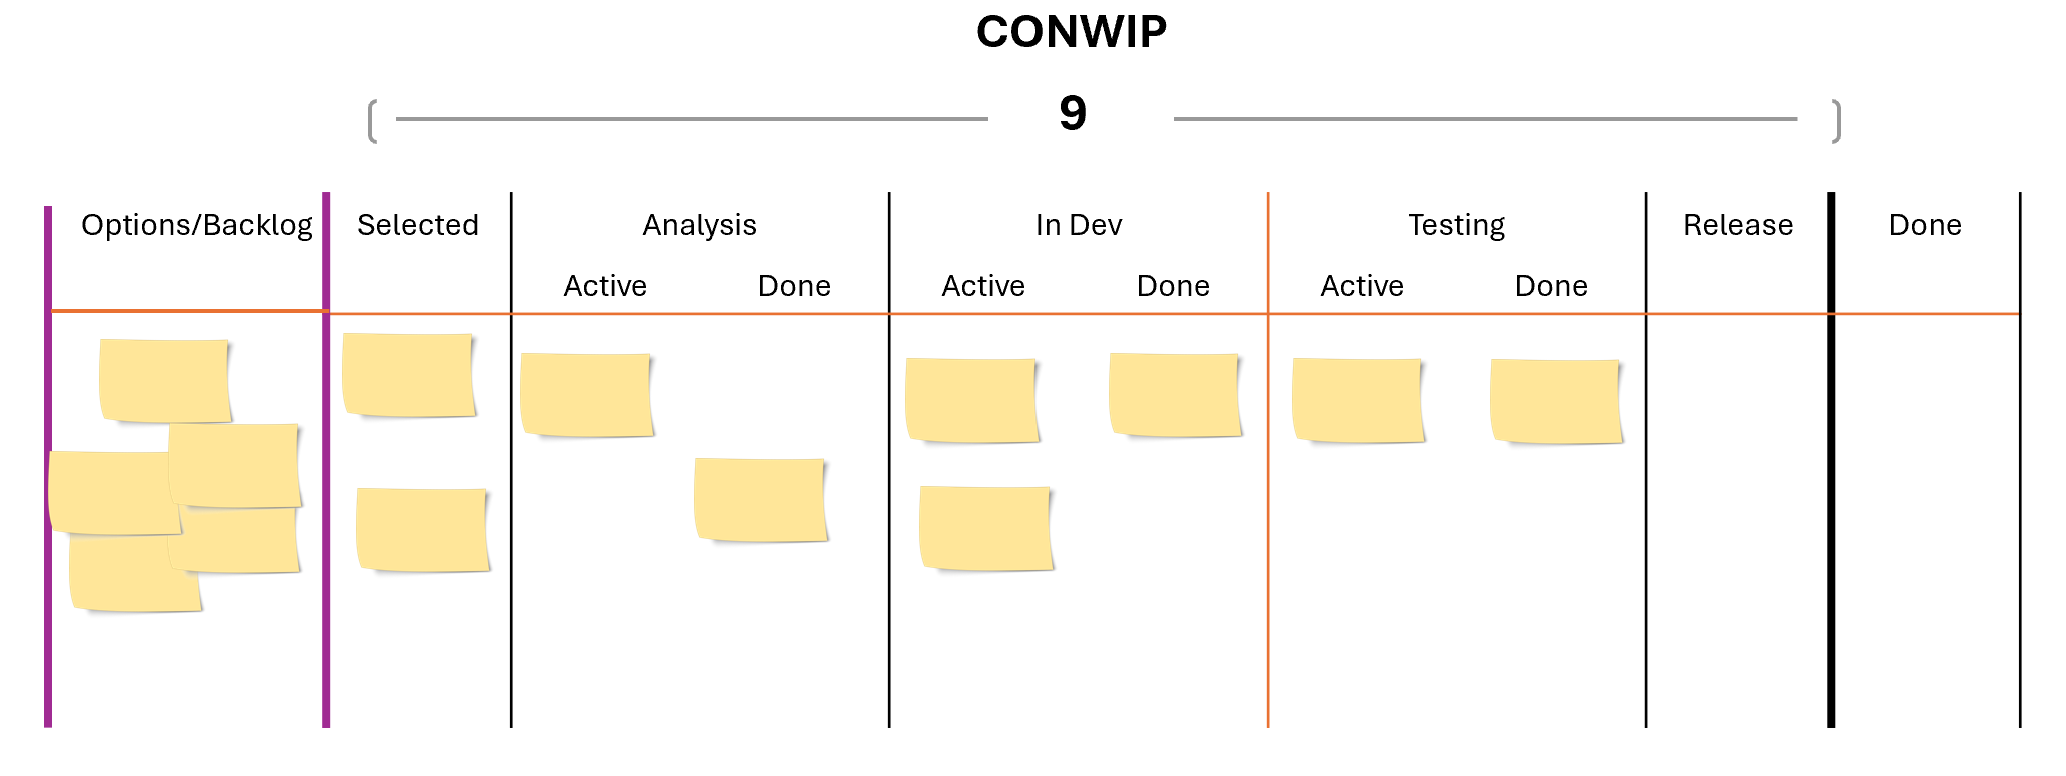
CONWIP designates a single WIP limit over multiple stages of the workflow.
WIP Limits per Workflow Stage
What it is: Each stage in your workflow has a limit on how many items can be in progress in that stage. E.g. a WIP limit of five for Analysis, four for In Dev, and three for Testing.
When to use: This approach is ideal when you want to identify flow behavior at specific stages (e.g. bottlenecks or underutilization of work items) to ensure a smooth flow through the entire process. When a stage hits its WIP limit, it signals the need for team members to resolve issues in that stage and collaborate to move work forward. This approach also prevents the entire workflow from slowing down due to one overloaded stage.
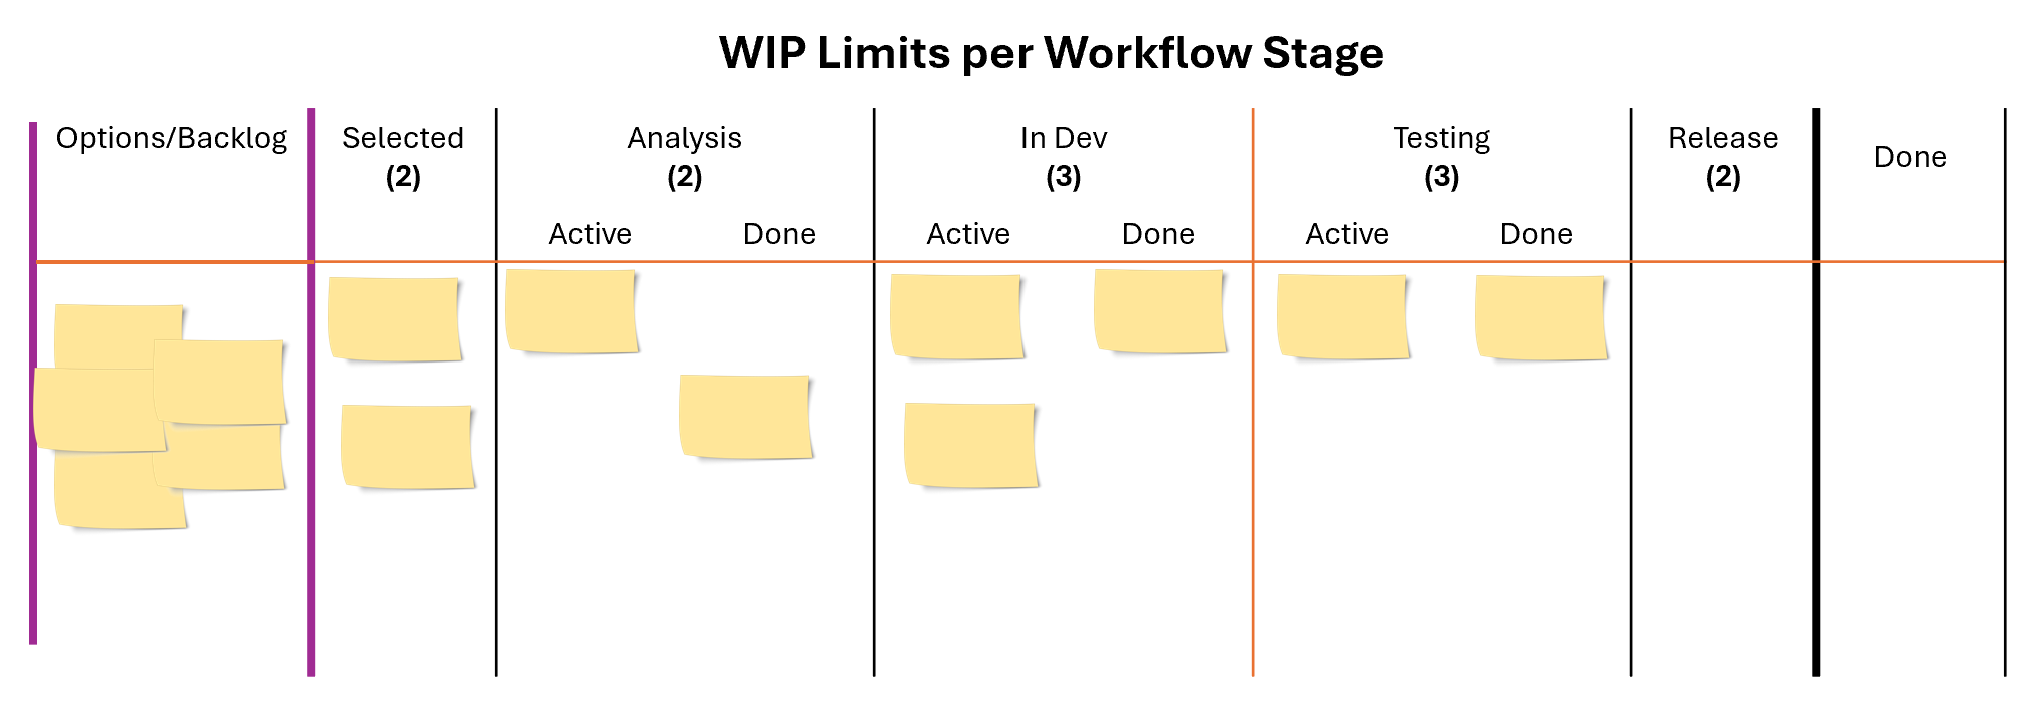
Limiting WIP for each workflow stage.
WIP Limits by Type of Work:
What it is: Different types of work (e.g., features, bugs, maintenance tasks) have separate WIP limits. E.g. No more than eight features, two bugs, and two maintenance tasks to be worked on at the same time.
When to use: Implement this when you need to ensure a balanced mix of work or when certain work types tend to dominate at the expense of others. Can be quite effective when teams face frequent unplanned work or interruptions to ensure planned work doesn’t get perpetually disrupted. A WIP limit on high-priority interruptions allows the team to respond effectively without compromising other ongoing efforts.
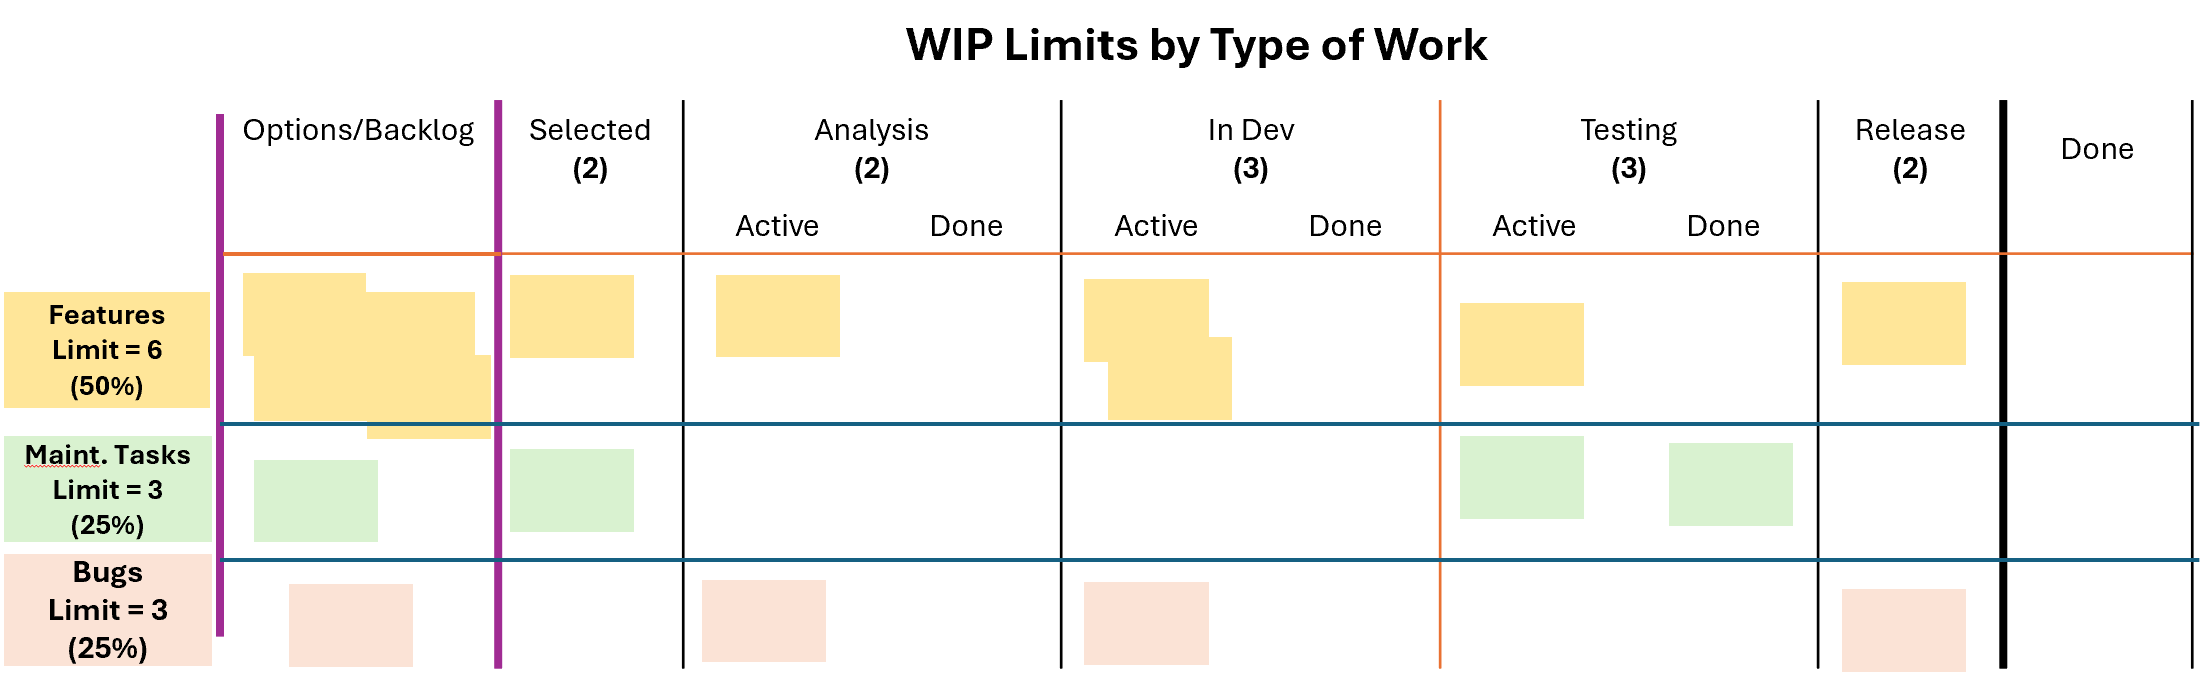
WIP Limits by Type of Work can also be combined with WIP Limits per Workflow Stage.
How to Set WIP Limits
Setting WIP limits is not an exact science, nor is there a secret formula to find what works best for your team. Instead it requires teams to balance data-driven measurements with practical experience. Teams can begin by collecting metrics like cycle time, throughput, and capacity utilization to understand their workflow patterns. Starting with conservative limits and monitoring how work flows can reveal trends and highlight bottlenecks or areas for improvement. Over time, adjusting WIP limits based on observed results and team feedback can help fine-tune the process. It’s also essential to trust the team’s intuition—sometimes, the right limit is one that "feels" manageable and sustainable. By combining data with a hands-on approach, teams can establish WIP limits that optimize flow, minimize bottlenecks, and align with their capacity.
Remember, the purpose for limiting work is to balance demand with capability and there are many approaches to doing this. The key to success with WIP limits is to start simple (perhaps by following the maturity progression above), monitor closely, and adjust as needed. With time and practice, you'll find the right balance that optimizes your team's workflow and predictability.